Basic Interface Development
Field Name for Data Link
If multiple fields are maintained in Field Name 1 to Field Name 5, this field indicates to which field an error should be linked in Monitoring and Error Handling if an error occurs during field mapping. If only Field Name 1 is maintained, this field is used automatically to create the link.
Value Mapping Function
Maintain a function module for a value mapping.
Value Mapping
The fields defined in Field Names 1 to 5 are available as parameters for the value mapping. To make use of the parameter, you have to insert '$' in an appropriate field in the value mapping. At runtime, '$' is replaced by the current value of the field. They can be used in a "where" condition or in a value mapping function defined in this value mapping. If an error message was defined in the value mapping, the fields can be used to replace placeholders in the error message as well. Furthermore, they can be used as external values for a single or multiple value mapping table. If you enter a name of a value mapping that does not exist, the system offers you the opportunity to create the value mapping.
Data Element for Conversion/Conversion Routine/Direction of Conversion Exit
Enter the conversion routine (for example, ALPHA) in the Conversion Routine field. Maintain the direction of the conversion in the Direction of Conversion field. Instead of entering a conversion routine, you can also insert a Data Element for Conversion (for example DATS).
Namespace / Check
You can enter the namespace and name of a check here. The check is executed during field mapping. If the check fails, the field mapping will also fail. Per default, the data in Field in Destination Structure will be checked. Select the Check Before Mapping checkbox to check the source data.
You can enter a fix value directly in the Field Name field. If a fix value should be entered in one of the source fields, you require a % followed by the value. for example, if the fix value for the field is 5, the field input has to be %5.
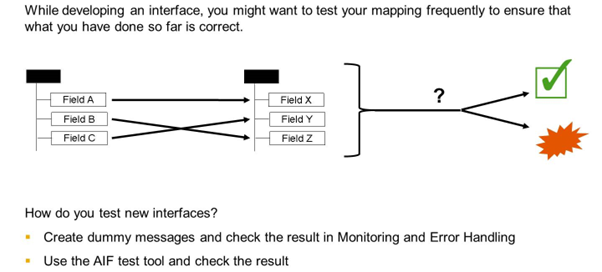
To test the mapping of an interface, you have two options: create data messages and try to process them or you can use the AIF test tool.
If you can create data messages, you can see the result in Monitoring and Error Handling. However, in some cases it might not be so easy to create new messages. Therefore, you can use the AIF test tool to test the mapping of your interface.

With the AIF test tool, you can create a test file for an AIF interface.
If the report is started, you can search for a test file. If it is necessary to create a new file, just choose Search on the first screen. You can also create a new file when the search result displays.
A list containing all existing files that meet the selection criteria is displayed. You can select an existing file from the list, or you can create a new file via the New Data button. A pop-up is displayed that enables you to select the interface that the file will be created for.
After selecting a file, you can open it via the Read Data button. The file is displayed on a new screen. The top half of the screen displays the structure of the data to be processed. You can insert data into the structure. You can add or delete new lines by choosing the Add/Delete buttons.
You can test the mapping of your interface. Choose the Transform button to execute the mapping. The bottom half of the screen displays data in the SAP structure. After the transformation is complete, you can check here if the mapping returns the expected results.
If the transformation is successful, the Process button is made available for use. Actions assigned to the interface will then also be executed and the test file will also be visible in Monitoring and Error Handling.
The log messages of the transformation are displayed in the bottom half of the screen. If the selected interface is an outbound proxy interface, the Send to PI pushbutton is made available.