Web Dynpro - Creating an Application

Step 7 − Now open the view structure and move the view MAINVIEW inside the window structure on the right hand side by Drag and Drop.
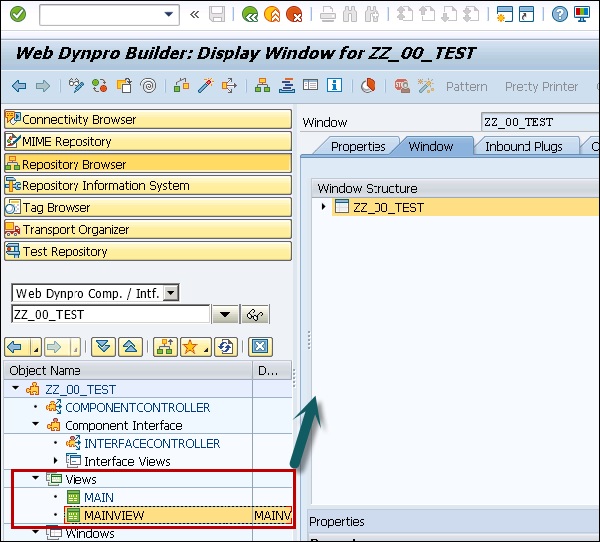
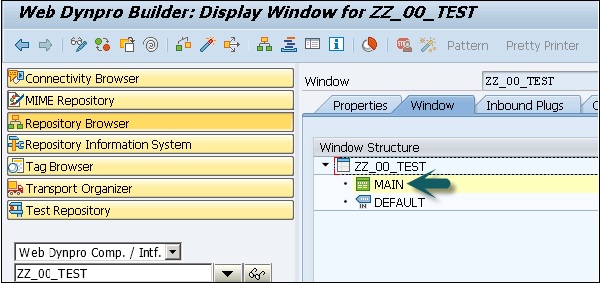
Step 8 − Open the window structure on the right hand side and you will see the embedded MAINVIEW.
Step 9 − Save by clicking the Save icon on top of the screen.
How to Create a View Context for MAINVIEW?
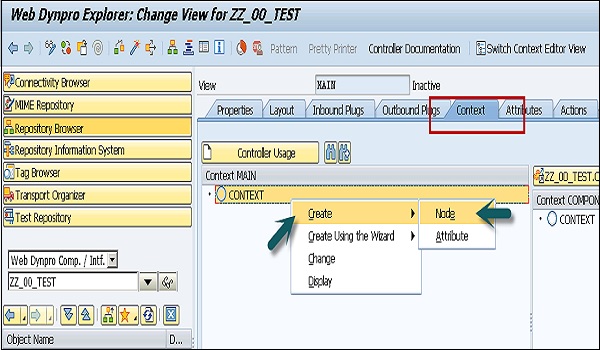
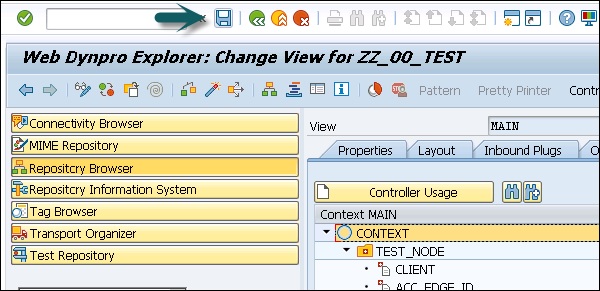
Step 1 − Open the View Editor to view MAINVIEW and switch to tab Context. Create a context node in the View Controller by opening the corresponding context menu.
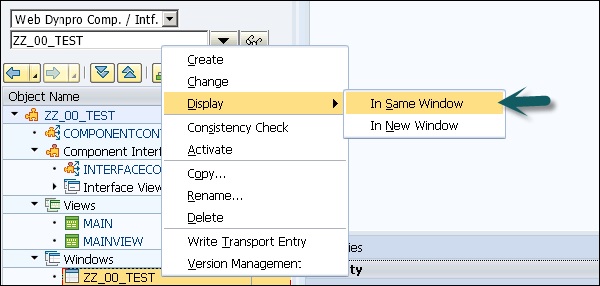
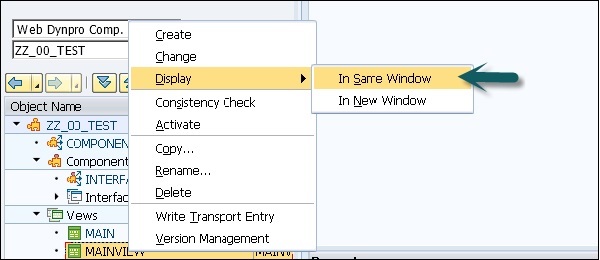
Step 2 − Select the View in the object tree and click Display.
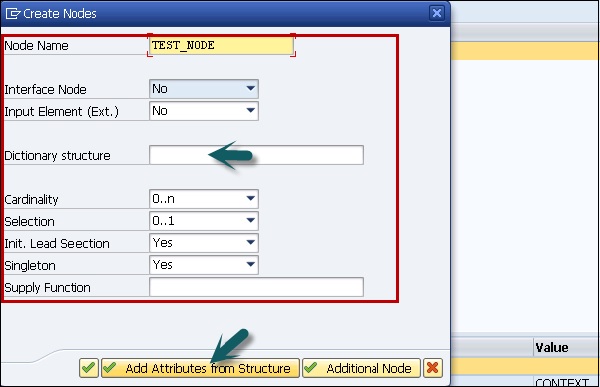
Step 3 − Maintain the Properties in the next window. Select the cardinality and dictionary structure (table). Select Add Attribute from Structure and select the components of the structure.
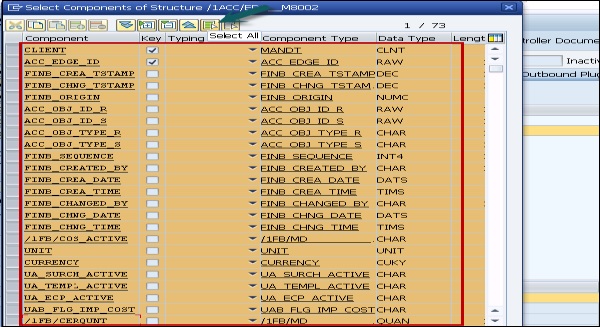
Step 4 − To select all the components, click Select all option at the top and then click the tick mark at the bottom of the screen.

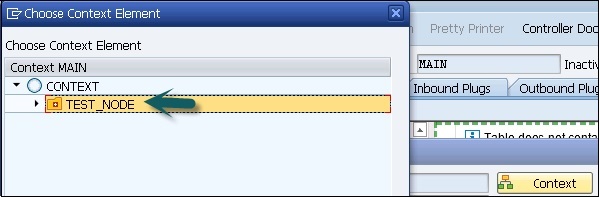
A context node TEST_NODE has been created, which refers to the data structure of the table and which can contain 0 → n entries at runtime. The context node has been created in the view context, since no data exchange with other views is planned hence component controller context usage is not necessary.
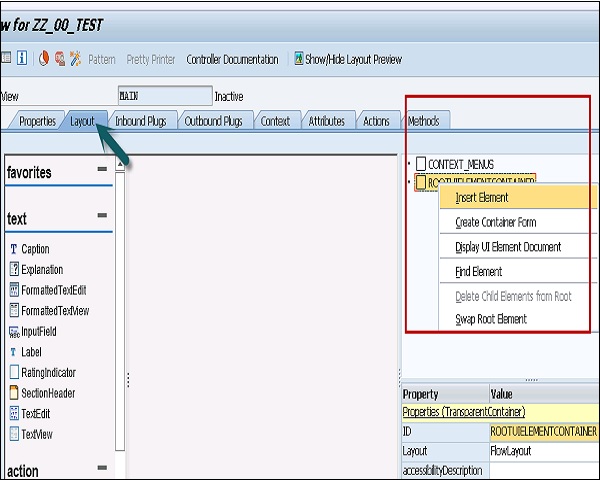
Step 5 − Save the changes to MAINVIEW by clicking the Save icon.
Step 6 − Go to the Layout tab of MAINVIEW. Insert a new UI element of the type table under ROOTUIELEMENT CONTAINER and assign the properties in the given table.
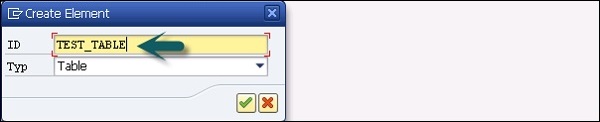
Step 7 − Enter the name of the element and type.
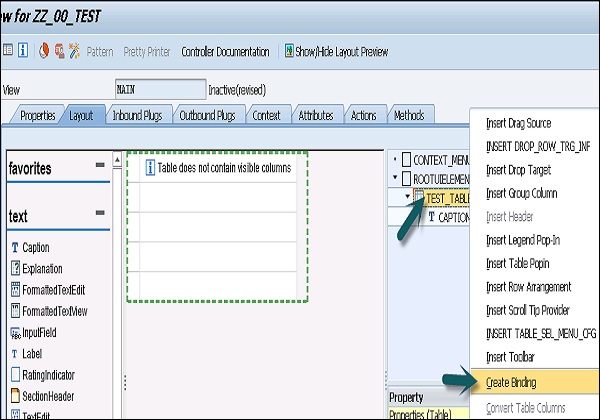
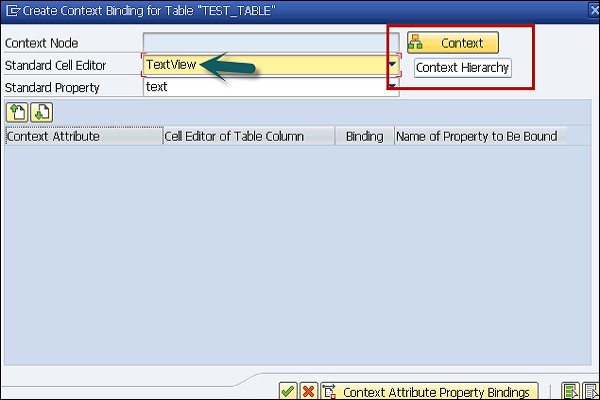
Step 8 − Create the binding of TEST_TABLE with context node TEST_NODE. Select Text View as Standard Cell Editors and activate bindings for all cells.
Step 9 − Click the Context button. Select the context node as TEST_NODE from the list.
Step 10 − You can see all the attributes by selecting it.