Advanced Scripting
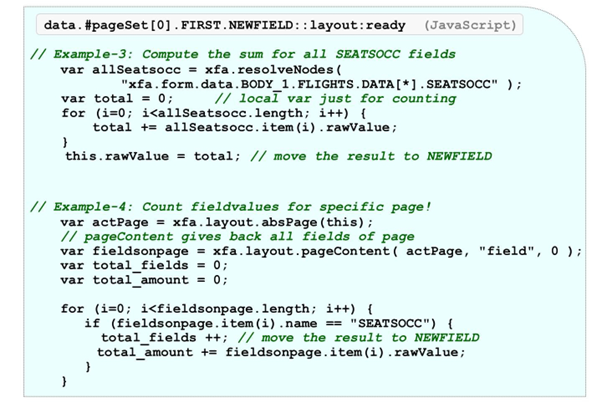
If you want to address a special row inside a table with a SOM expression, it is not possible to simply introduce the iterator at the correct position. The iterator itself would not be resolved automatically.
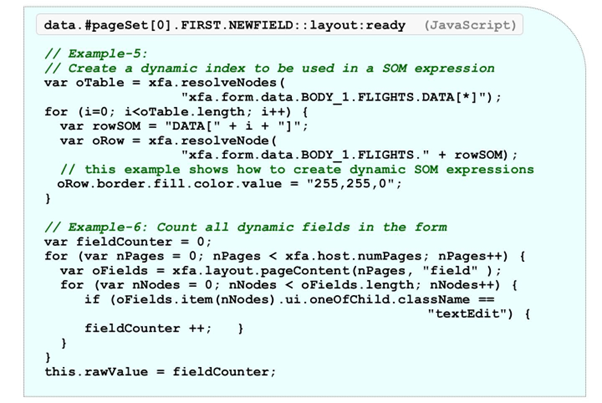
Using a usual iterator inside the brackets “[”, “]” would fail. The iterator has to be resolved and merged into the string-based SOM expression (see example 5 in the figure).
Example 6 is challenging. It shows how to access or count all dynamic fields inside a form and uses nested FOR statements.
The next topic is about the built-in library, called the “tableCalcs”.
They offer powerful functions for the numeric content of fields. If you choose them, you do not need to code most things yourself.
There is a useful collection of “tableCalcs” functions inside the FormBuilder group of the object library.
The collection consists of three functions:
- sum
- avg
- count
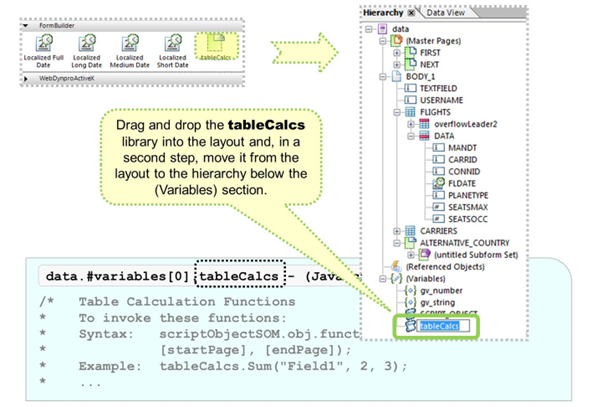
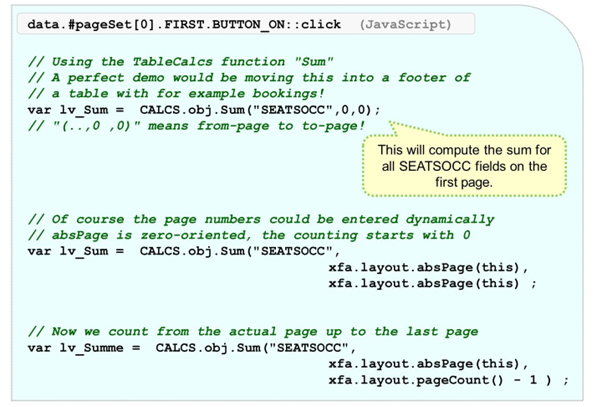
Compared with the “pageContent” technique, there is even less coding to create.
Drag and drop the tableCalcs element from the library into the layout and, afterward, drag it into the hierarchy. You must do this in two steps. It is not possible to drag the functions directly into the hierarchy.
We recommend that you rename the tableCalcs to a more suitable expression, for example CALCS or TC.
If you are an experienced JavaScript developer, feel free to analyze the built-in coding of those three functions.
The next topic is about manipulating the rows of dynamic tables.
Sometimes it is necessary for users to add or delete table rows. To achieve this, scripting is needed.
The Instance Manager of subforms rows will be used now!
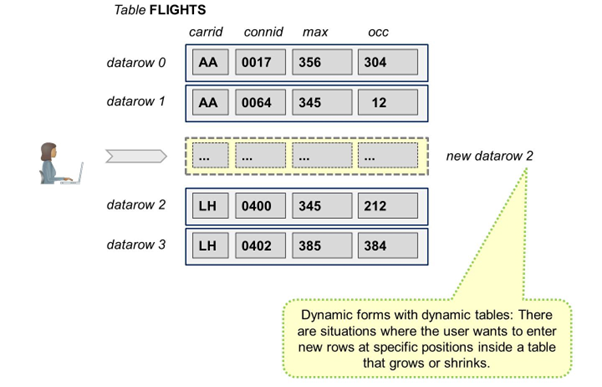
The user can change the number of rows in tables. To achieve this, always use dynamic forms.
When you adding new rows inside body pages, the amount of space in the body (which is the topmost subform) will grow. When you delete rows, the body will shrink, depending on the content type of the body page.
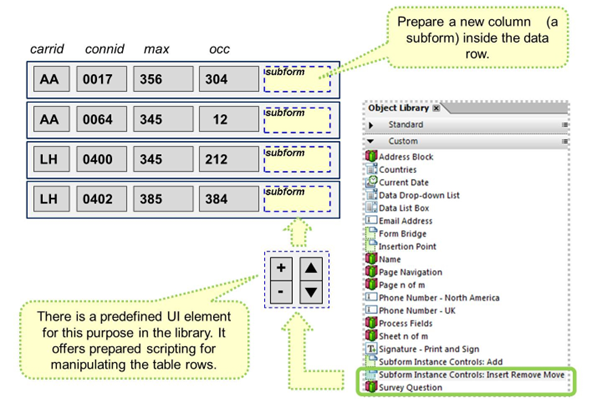
Typically, adding and removing DATA rows is triggered via buttons in an interactive form. Those buttons are typically nested inside repeating subforms. In this example, they are nested inside the DATA row itself.
To better structure the buttons, encapsulate them in subforms. The result will be a subform (with buttons) inside the DATA subform. The inner subform is just another new field that has to be created inside the exterior subform DATA.
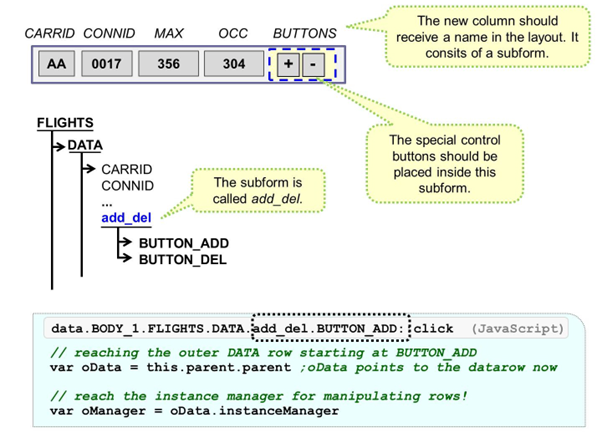
The following examples show you how to add or remove instances of a subform (DATA) at runtime.
You can create additional instances by invoking the instance manager property.
Be careful to ensure that adding a subform will not violate the max occur value. The same applies to deleting instances. The min occur value should not be violated.

If the predefined UI elements (those four arrows) are used to add, delete, and move rows, the LCD automatically generates the necessary scripting.