Creating global class
Definition of Global Classes
As with subroutines, use local classes or interfaces only within the program in which they are defined and implemented. The CLASS statement is a local, declarative statement in the program. As the TYPES statement defines local data types, the CLASS statement defines local object types.
On the other hand, global classes or global interfaces are individual repository objects with all the standard ABAP Workbench features such as active integration, versioning, transport system. The namespace convention, for example Y*, Z*, or a special customer namespace is the same as that name used for the namespace of other repository objects.
Therefore, a special maintenance tool is available in the ABAP Workbench, which is the Class Builder.
If you are unsure about a certain feature in the Class Builder, you are advised to use the Quickinfo. It is the explanatory text that appears when you place the cursor over an icon and leave it there for a short time.
Creating Global Classes in the Object Navigator
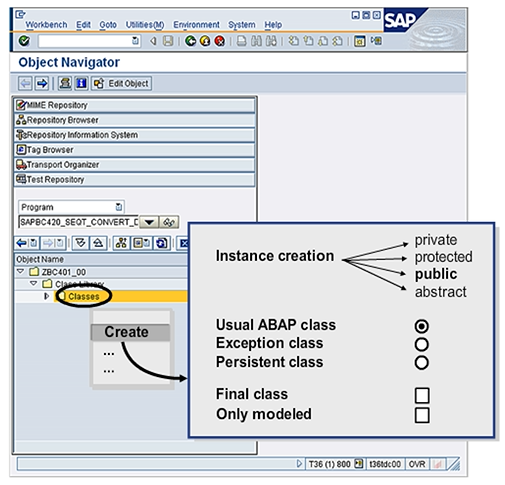
As with other repository objects, the separate navigation area of the Object Navigator makes it the ideal development tool for all repository objects. The easiest way to create a new global class is to use the context menu in the navigation area. To do so, first select the package node or select the class node within a package.
A dialog box appears that offers you some choices for the new class. Select Usual ABAP class.
The global class or global interface is then displayed in the Class Builder table in the editor area of the Object Navigator.
Definition of Attributes in a Global Class
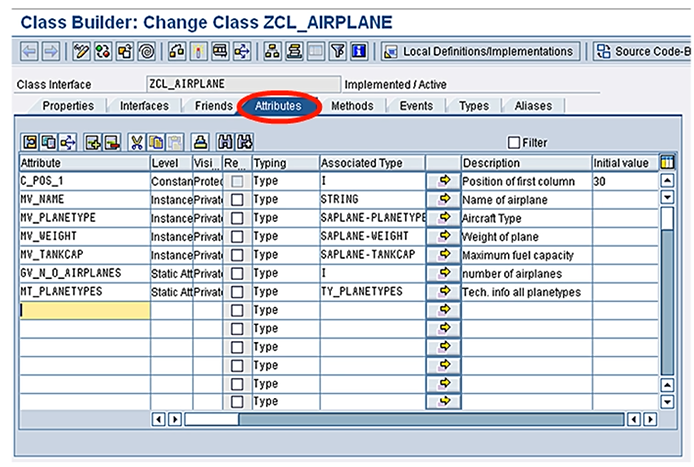
Choose the Attributes tab page to open a list of all attribute definitions in the class. You can also define new attributes here.
You can use the input help when defining the types of attributes. Remember to use meaningful short descriptions.
Create Methods in Global Class
Choose the Methods tab page to open a list of all method definitions in the class. You can define new methods here. Remember to use meaningful short descriptions.
There are separate editor windows for the method parameters (also known as method signature) and the implementation.
Choose the Constructor button to define an instance constructor. The system automatically chooses the name of constructor.
Hint: Methods can be transported separately because each implementation is stored in an own ABAP include.

Definition of Method Parameters
In the method list, select a method and choose the Parameter button to go to the signature maintenance. You can define new formal parameters here. You can use the input help when defining the type of the parameters. Remember to use meaningful short descriptions.
You can browse between the signatures with the help of the Previous Method or Next Methods button. Choose the Methods button to return to the method list.

Implementation of Methods
In the method list, select a method by double-clicking it. Alternatively, choose the Source code button to go to the source text maintenance if a method is already selected. You can implement the methods here.
Hint: Choose the relevant button to display the method’s signature.

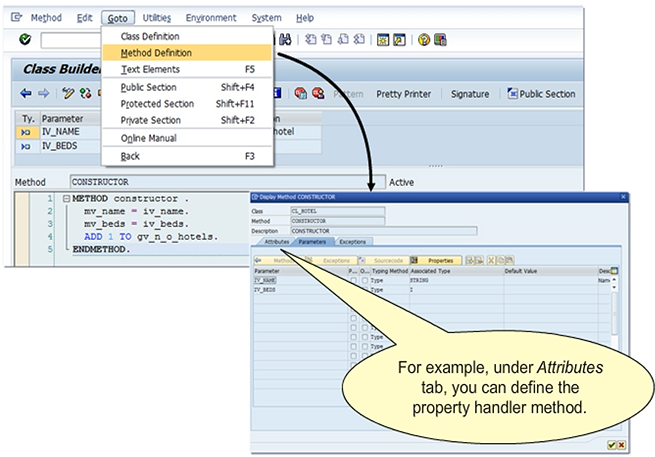
Displaying the Method Definition
Choose Goto → Method definition to change the attributes of your method during implementation. Optionally, you can define an event handler method on the Attributes tab page in the dialog box.
Definition of Components Using the Navigation Area
You can define attributes, methods, or events in the context menu of the Object Navigator’s navigation area. The properties are then maintained in a dialog box, and not in the table.
Hint: Choose Class →