Navigation between two views
.jpg)
Similarly create an outbound plug to navigate from the first view to the second view.
.jpg)
Similarly, create an inbound plug and outbound plug for the second view.
.jpg)
In the outbound plug tab of the second view create an outbound plug.
.jpg)
Step 10:
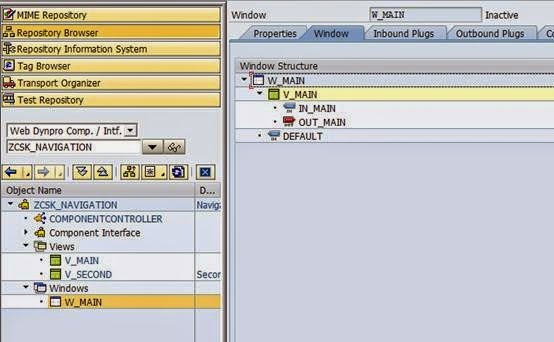
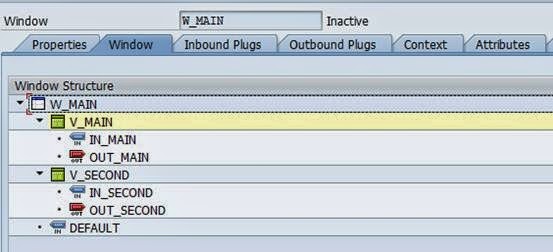
Go to the Window controller and you will be able to see only the view v_main which was created at the time of the creation of component will be there.
Now embedded the second view which we created in our window and create a navigation link between views.
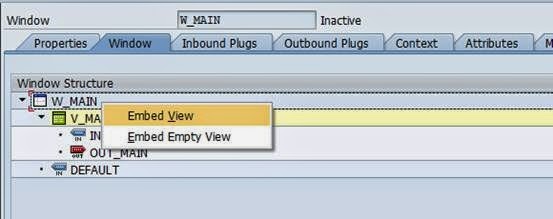
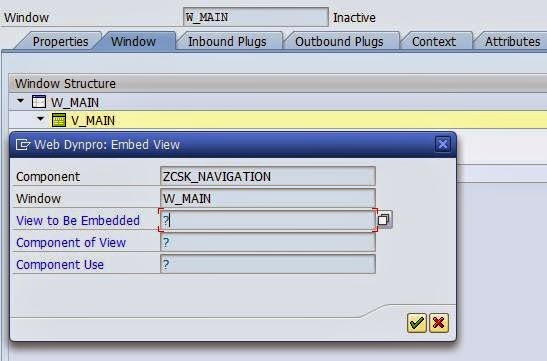
Choose the view to be embedded as our second view from the popup.
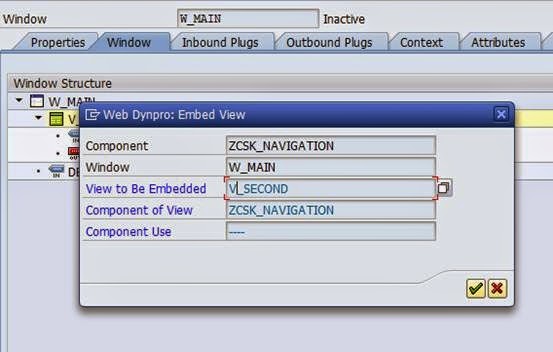
You will now be able to see both the views under our window.
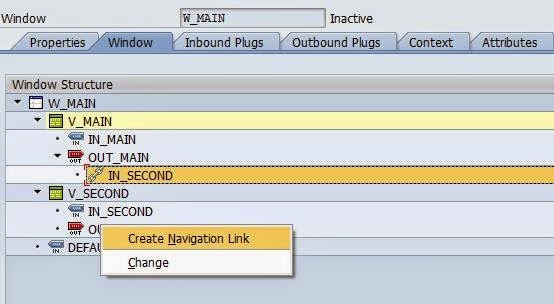
Right-click on the outbound plug to create the navigation link.
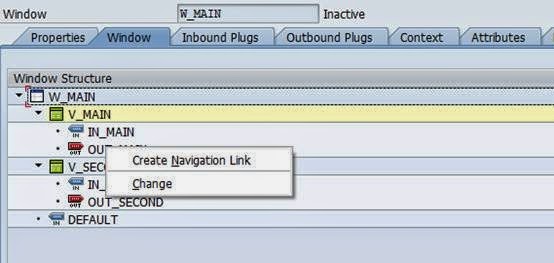
Select create a navigation link and choose the destination view using F4 to help an press enter.
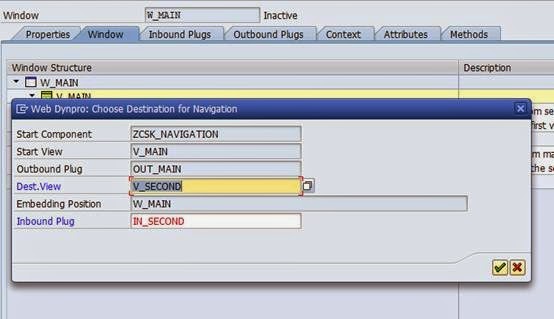
Now you will see the navigation link is formed between the views indicated by a chain symbol. Now when ever the outbound plug out_main is triggered the system will navigate from the first view to the second view. Similarly, create the path from the second view to the first view.

Create a navigation link from the second view to the first view.
Choose the first view as destination.
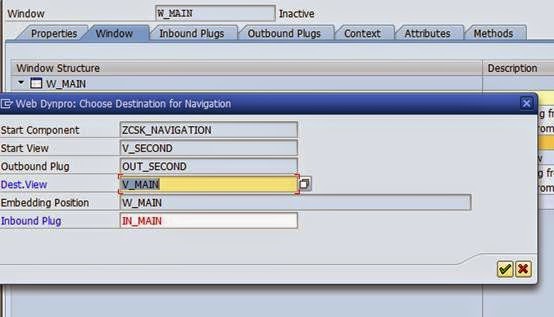
Now navigation link from the second view to the first view is created.

Step 11:
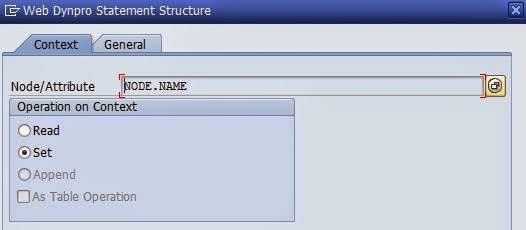
Now let us write the logic to read the input entered by the user and set it in the context node.
In the event handler method of the button UI element in the first view write the logic to read the input and set the context node.
The Input field is bound to the context attribute name so Reading the context node attribute will give the value entered by the user.
Using the code wizard read the context node attribute name.
The code will be generated as below.
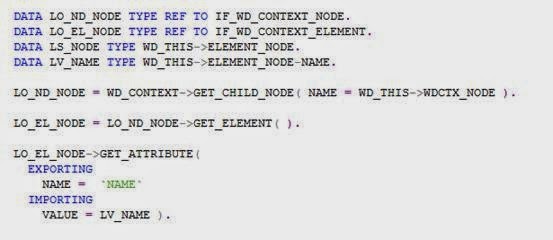
Note: I have removed the unwanted and dead codes.
Now set the value to the same attribute name.